RainGain Gutter 125mm x 2.45m - White


Product Description
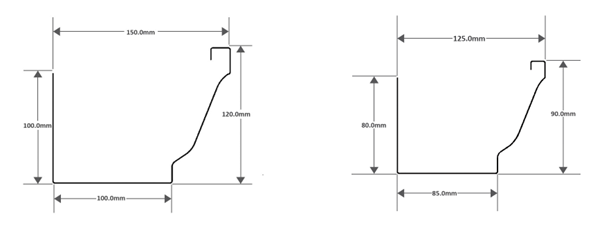
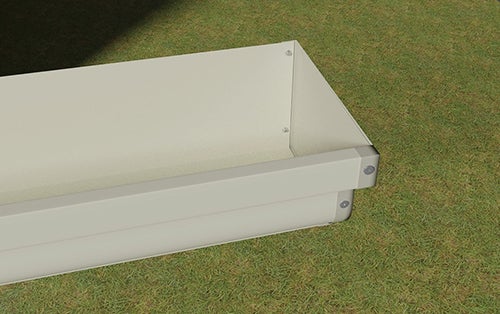
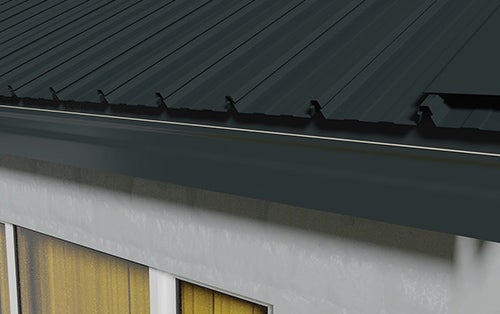
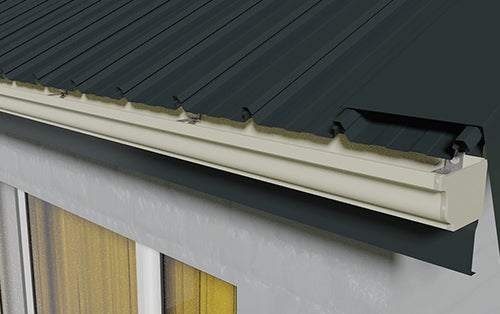
Our RainGain range is a popular range of aluminium and aluminium-zinc gutters. The design is typical of the OGEE gutter system that incorporates a double curve with the shape of an elongated ‘S’. In South Africa, the most commonly used gutter sizes are the 125mm residential and 150mm industrial gutters (measured front to back at the widest point). RainGain gutters have almost twice the water carrying capacity of their half-round competitors of the same width, and can be rolled in a wide range of colours to match any architectural design.
| Gutter Body |  |
| Application | Fixed to the roof structure, through the fascia with aluminium gutter brackets at 600mm centres. |
| Size | 125mm / 150mm RainGain brackets |
| Material | C1S ALUM |
| 125 Code | GU0400 GU0450 |
| 150 Code | GU0405 GU0455 |
DIY Installation steps:
Gutter Installation
|
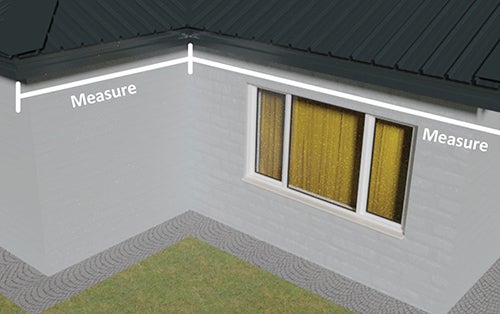
1. Measure around the building
|
 |
|
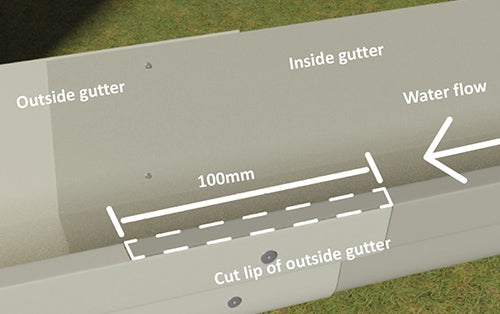
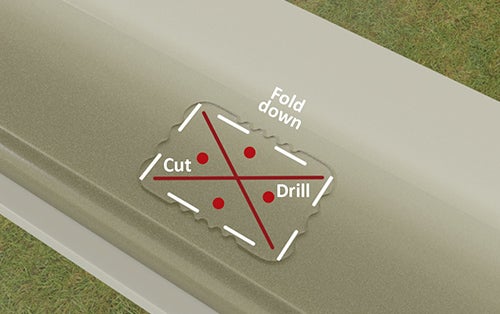
2. Assemble pre-cut gutter lengths on the ground Connect the two gutter sections by cutting back 100mm on the front lip of the gutter & slide the second piece inside (in the direction that water needs to shed). |
 |
|
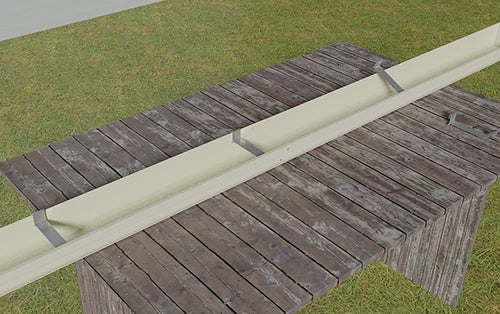
3. Install gutter brackets With the gutter assembly complete, space out the gutter brackets inside the gutter, based on the truss/rafter spacing and add one bracket between these (total distance between brackets should be 500- 700mm). |
 |
|
4. Assemble stop ends Apply stop-ends to the gutter lengths where you require the flow of water to stop. |
 |
|
5. Cut holes for the downpipes in the gutter Using a piece of the downpipe, trace the outline of the downpipe on the bottom of the gutter where you want the section installed. |
 |
|
6. Line-up gutter To ensure a straight line when hanging a gutter, make use of a nail & string line/chalk line along the edge of the roof to serve as a guide when installing the gutter. |
 |
|
7. Hang the gutter Slide the gutter (with brackets inside) in place, to line up with the pre-marked line. |
 |